Setting up a PerfSONAR Node using an ISO File
Introduction: This document provides instructions on setting up perfSONAR nodes from the ISO file provided by perfSONAR. Use these instructions if you are setting up a new server with no operating system installed on it yet.
Requirements:
- Computer or virtual machine (VM) with an internet connection and public IP address
- CentOS ISO file with PerfSONAR toolkit
- If the internet connection is stable and is available to the computer/VM during installation, download the following
- If the internet connection is unstable or otherwise not available to the computer/VM during installation, download the following
VirtualBox Setup
- Download VirtualBox ( https://www.virtualbox.org/wiki/Downloads ) and install on your computer.
- Create a Linux VM in VirtualBox with RedHat 64-bit version and at least 2GB RAM and storage.


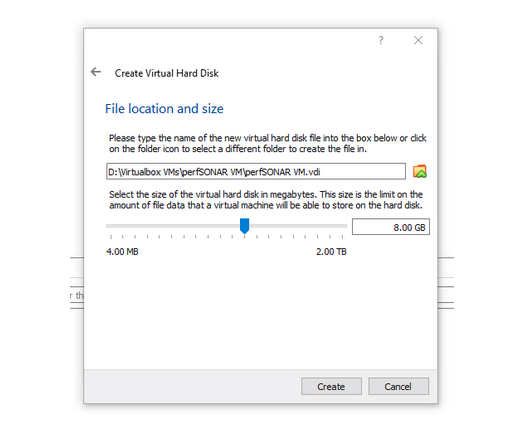
- Double-click the new VM to start it running. It will prompt you with “Select start-up disk”. Choose the CentOS ISO file with perfSONAR installed as the start-up disk.

Post-OS Install for Oracle-VM
-
Power off the VM
-
In the Oracle VM manager, right-click on the VM and select “Settings > System”
-
Go to the “Boot Order” Section in the menu and move the Hard-Disk up to the highest priority.
-
This will make sure that when the VM starts up again, it starts up on the newly installed OS.
Setting up internet connection to VirtualBox VM on the host computer
-
Power off the VM if it is still running
-
Right-click and go to “Setting > Network”
-
Change the “Attached to” value for the Network Adapter from NAT to Bridged Adapter.
-
This sets up the VM’s network monitor to be treated like another device on the host computer’s network, rather than having the host act as a router for the VM.
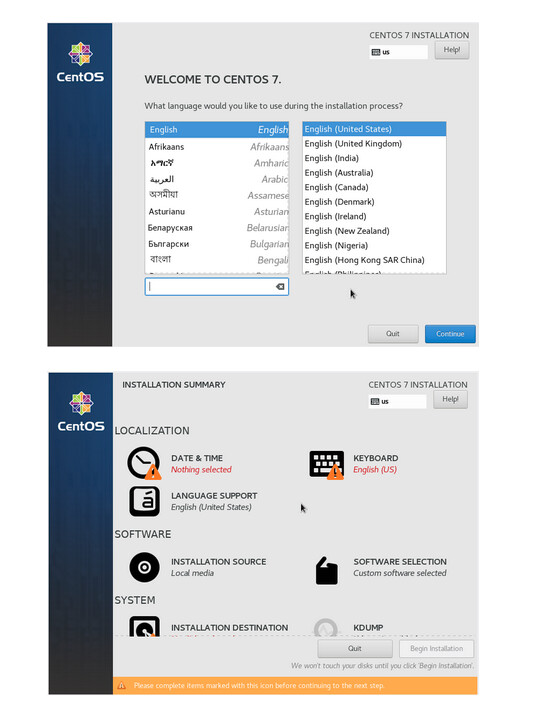
CentOS 7 Install
Installing the OS
- Verify whether the downloaded file is not corrupted using the md5 checksum before beginning installation.
a.If you are using the NetInstall ISO, run the following command and verify that the two lines of output match
md5sum pS-Toolkit-4.X-CentOS7-NetInstall-x86_64.iso; cat pS-Toolkit-4.X-CentOS7-NetInstall-x86_64.iso.md5
b. If you are using the FullInstall ISO, run the following command and verify that the two lines of output match
md5sum pS-Toolkit-4.X-CentOS7-FullInstall-x86_64.iso;cat pS-Toolkit-4.X-CentOS7-FullInstall-x86_64.iso.md5
c. Re-download the iso and md5 files if they do not match.
- Boot up the computer you want to install the OS on with the ISO file.
a. For an Oracle VirtualBox VM or similar, this involves following VM instructions on creating a new VM with the ISO file. See the VirtualBox Setup instructions above for details about this.
b. For a physical machine, this involves mounting the file onto a DVD or USB drive and inserting it into the server before booting it up.
-
Select “Install the PerfSONAR Toolkit”

-
Select language
-
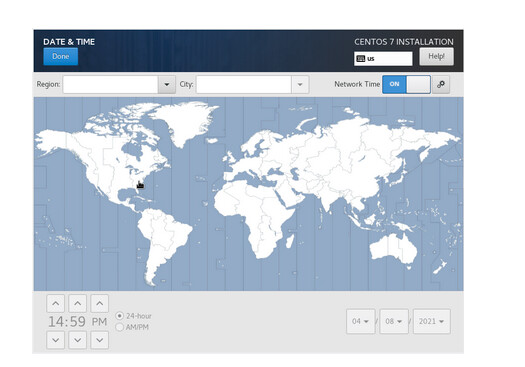
Select Date & Timezone and select the time zone you want to use
-
Select Keyboard setup and select the keyboard configuration you would like to use.

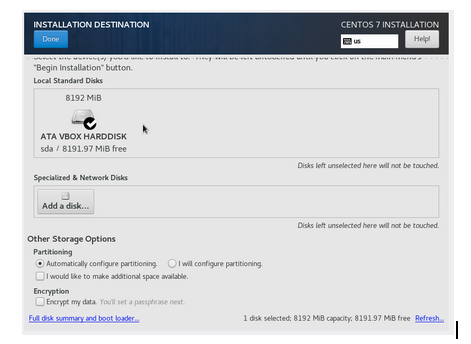
- Select “Installation Destination” to setup the hard drive

a. Select the disk (if following the instructions, there should be only one)
b. Select “Automatically configure partitioning disk”
-
Select “Begin Installation”
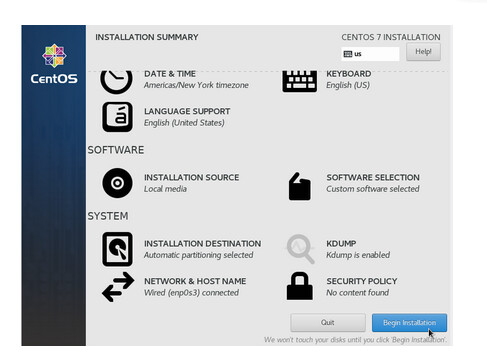
-
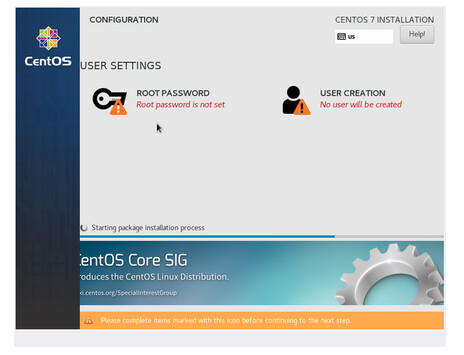
Configure the root user (No need to setup other user yet)

- When the installation is done, select “Reboot” to restart the server.

Post-Install Configuration
- Login as root
- Set up first user
a. This is an administration user for using with the web interface
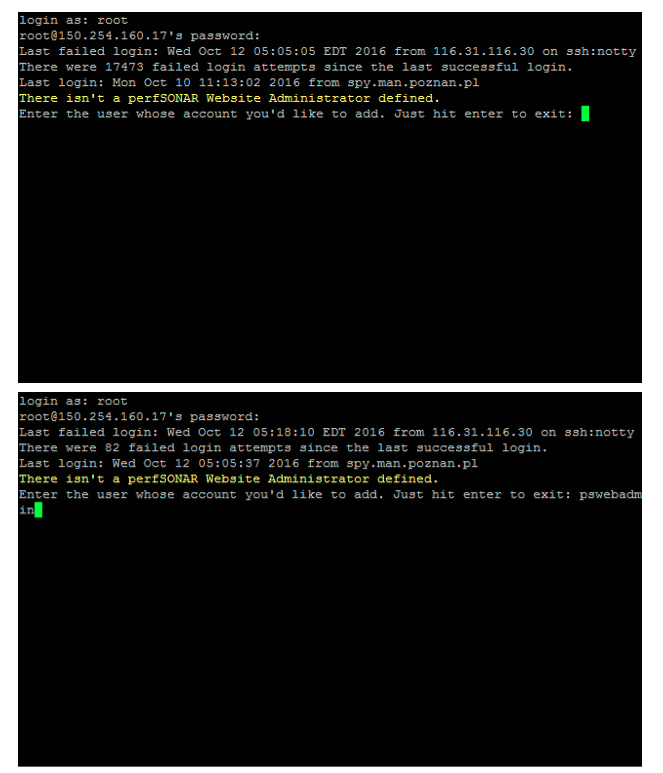

- You will then be asked “Would you like to create a sudo user and disable root SSH?”
a. Type “yes” or just hit enter
- Set up a second user
a. This is for doing administration on the server via SSH


-
Afterwards, you will end on a terminal as root

-
Check that the following services are running using the following command
systemctl status SERVICE-NAME
a. The following are service names you can use in the above command to ensure the node is up and running
i. pscheduler-scheduler
ii. pscheduler-runner
iii. pscheduler-archiver
iv. pscheduler-ticker
v. psconfig-pscheduler-agent
vi. owamp-server
vii. twamp-server
viii. perfsonar-lsregistrationdaemon
Finalizing perfSONAR Setup (via WebUI)
- You can now login via the webUI at “https:///toolkit” using the web admin credentials you made in step 2.

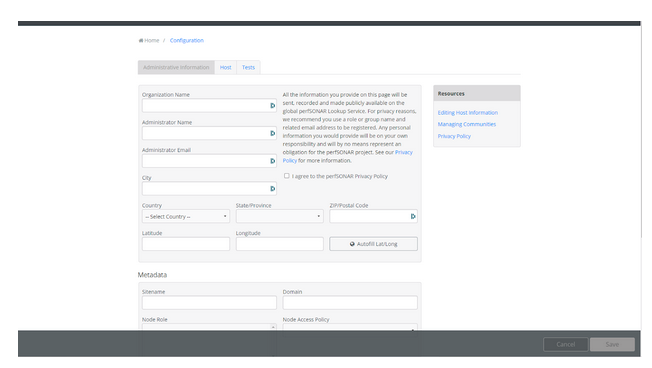
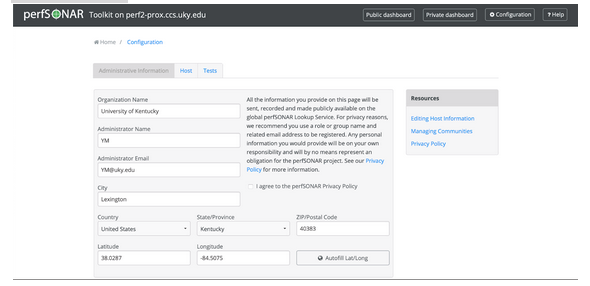
- Click the “Configuration” button in the top right-hand corner. You will be prompted to enter in your web administrator username and password you made previously.
a. Here, you can add information about your organization name, administrator name, administrator email, etc.
b. You’ll need to mark the checkbox “I agree to the perfSONAR Privacy Policy” and then click the “Save button” at the bottom of the screen to save these changes.

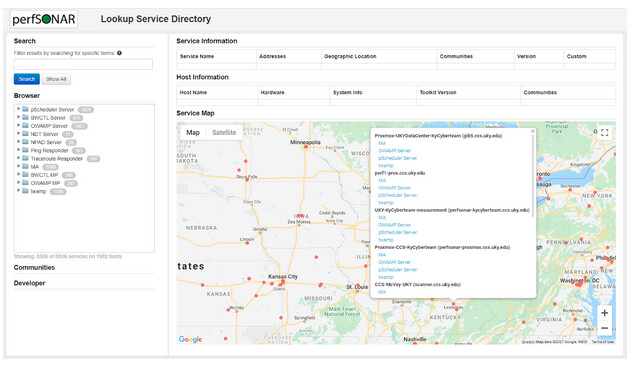
- After some time (up to 24 hours but usually within an hour or so) you should be able to go to the perfSONAR global registry (Lookup Service Directory) and search for your node
a. You can either use the search bar to find you node or scroll on the online map to where you node is physically located to find kit
4. You should now be set up and can begin adding tests to your new perfSONAR node.
Configuring tests with other hosts (via Web UI)
-
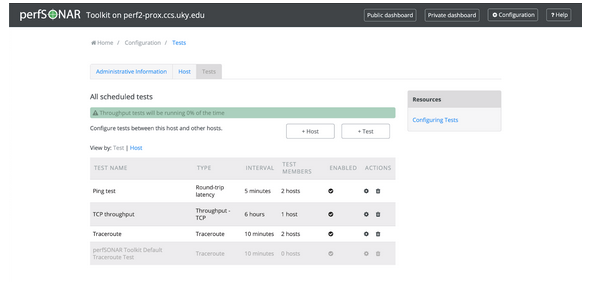
Click the “Configuration” button in the top right-hand corner to configure tests with other hosts.
-
Click on “Tests”
-
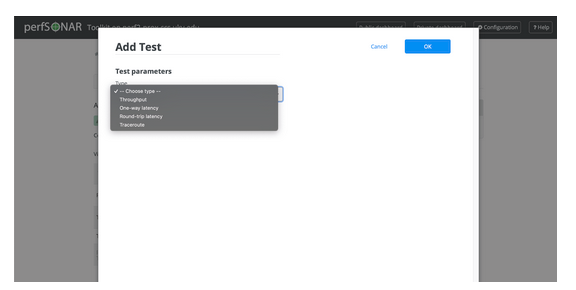
Click on “+ Test” to add a test.
-
Select the type of test.
-
Enter the test name/description and add Test Members
-
Enter Hostname/IP and Host description (optional) and click add host.
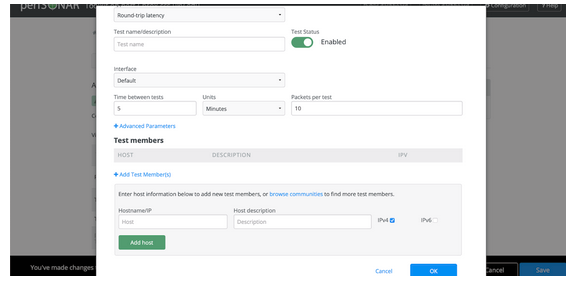
-
Click “OK.”
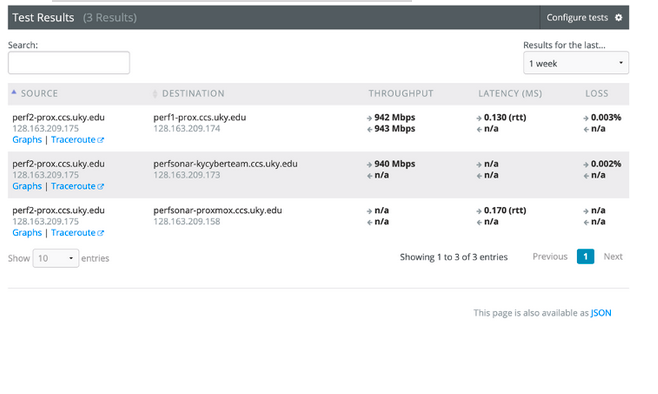
At this point, your PerfSONAR node will start testing with the hosts added and you should be able to see the results in the “Test Results” section of your toolkit homepage.
Configuring tests with KYCyberteam
To configure tests, you need to download the configuration file given below.
- Contact an administrator on the KYCyberteam to let them know you want join the KYCyberteam tests
a. Current administrators
1. Tyler Burkett ([tyler.burkett@uky.edu](mailto:tyler.burkett@uky.edu))
b. Make sure to include the IP address and hostname of the perfSONAR node you want to use
- On the command line after you receive confirmation from the administrator, run the following commands to add the KYCyberteam test configuration file to your perfSONAR node.
a. Substitute the URL in the command with the one provided by the administrator.
sudo psconfig remote add --configure-archives “http://128.163.204.60/psconfig/CONFIG_FILE.json”
- Run the following command to restart pScheduler, the service which reads the configuration file and automatically begins running the tests.
sudo systemctl restart psconfig-pscheduler-agent
- After a couple of minutes, you should be able to see test results in the “Test Results” section of your perfSONAR web interface.
For more information, visit the links below:
-
Net Install download guide: Toolkit NetInstall Guide — perfSONAR Toolkit 4.4.0 documentation
-
Full Install download guide: Toolkit Full Install Guide — perfSONAR Toolkit 4.4.0 documentation
-
Configure the ToolKit for the first time: Configuring the Toolkit for the First Time — perfSONAR Toolkit 4.4.0 documentation
-
For updating PerfSONAR: Updating perfSONAR — perfSONAR Toolkit 4.4.0 documentation