Setting up a PerfSONAR Node using the Package Manager
Introduction: This document provides instructions on setting up perfSONAR nodes on an already existing Linux computer using the Linux package manager. Use these instructions if you are using an already existing Linux server.
Requirements:
- A Linux computer (CentOS 7) with an internet connection and public IP address
- A super-user account on the computer
CentOS Install
Installing the Software
-
Start by configuring yum. Run the following commands.
sudo yum install epel-release sudo yum install http://software.internet2.edu/rpms/el7/x86_64/latest/packages/perfSONAR-repo-0.10-1.noarch.rpm sudo yum clean all -
Disable Security-Enhanced Linux features (SELinux) using:
sudo setenforce 0 -
The above step is important since SELinux can potentially interfere with the installation of the perfSONAR toolkits
-
Install the perfSONAR toolkit bundle.
sudo yum install perfsonar-toolkit -
Enter “y” whenever prompted.
Post-Install Configuration
-
Configure an admin account for the webUI by running the following command
sudo /usr/lib/perfsonar/scripts/nptoolkit-configure.py -
When prompted with the screen below, type in “2” and hit “ENTER”

- When prompted with the screen below, type in “1” and hit “ENTER”

- Enter the username and password for the admin account you want to create. Make sure to pick a strong password.

-
Enter “0” a couple of times to exit the script and return to the command line
-
(Optional) Check that the following services are running using the following command
systemctl status SERVICE-NAMEa. The following are service names you can use in the above command to ensure the node is up and running
- pscheduler-scheduler
- pscheduler-runner
- pscheduler-archiver
- pscheduler-ticker
- psconfig-pscheduler-agent
- owamp-server
- twamp-server
- perfsonar-lsregistrationdaemon
Finalizing perfSONAR Setup (via WebUI)
- You can now login via the webUI at “https:///toolkit” using the web admin credentials you made in step 4.

-
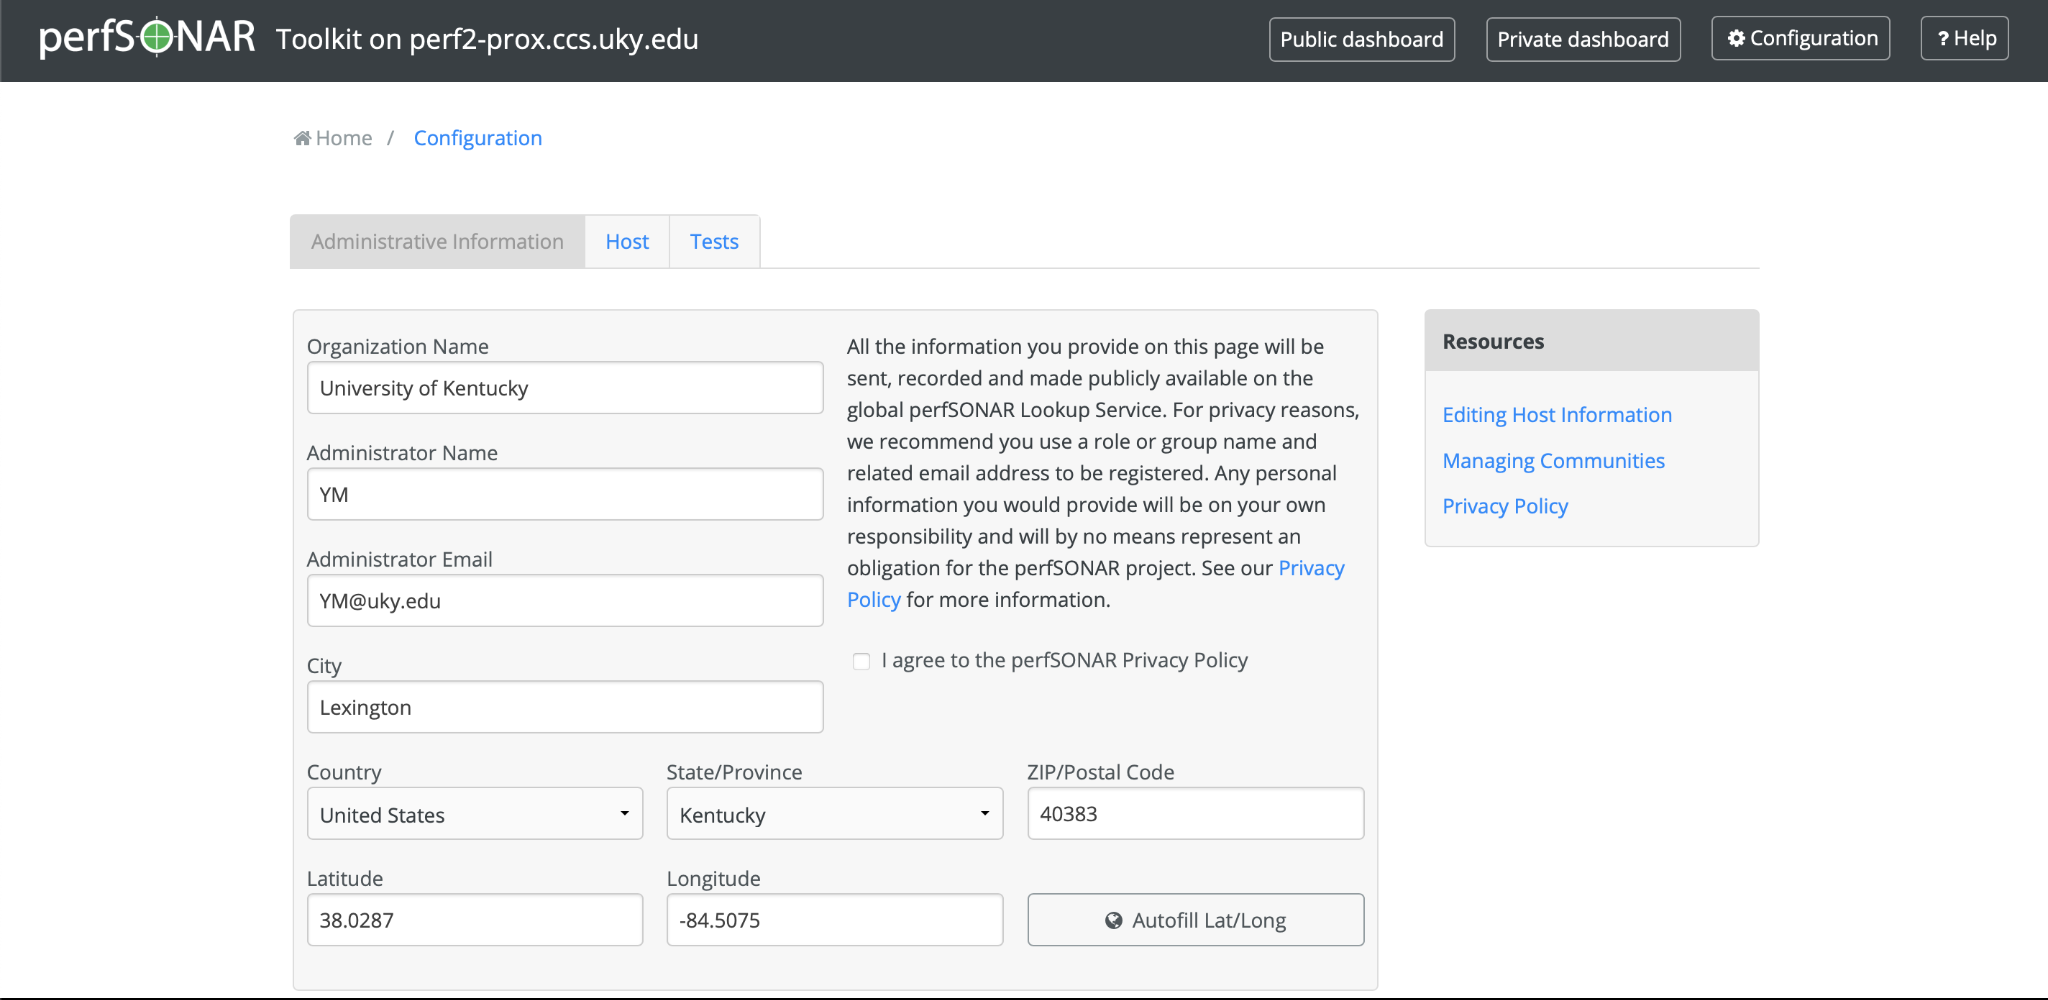
Click the “Configuration” button in the top right-hand corner. You will be prompted to enter in your web administrator username and password you made previously.
-
Here, you can add information about your organization name, administrator name, administrator email, etc.
-
You’ll need to mark the checkbox “I agree to the perfSONAR Privacy Policy” and then click the “Save button” at the bottom of the screen to save these changes.


-
After some time (up to 24 hours but usually within an hour or so) you should be able to go to the perfSONAR global registry (Lookup Service Directory) and search for your node
a. You can either use the search bar to find you node or scroll on the online map to where you node is physically located to find kit

- You should now be set up and can begin adding tests to your new perfSONAR node.
Configuring tests with other hosts (via Web UI)
- Click the “Configuration” button in the top right-hand corner to configure tests with other hosts.
- Click on “Tests”
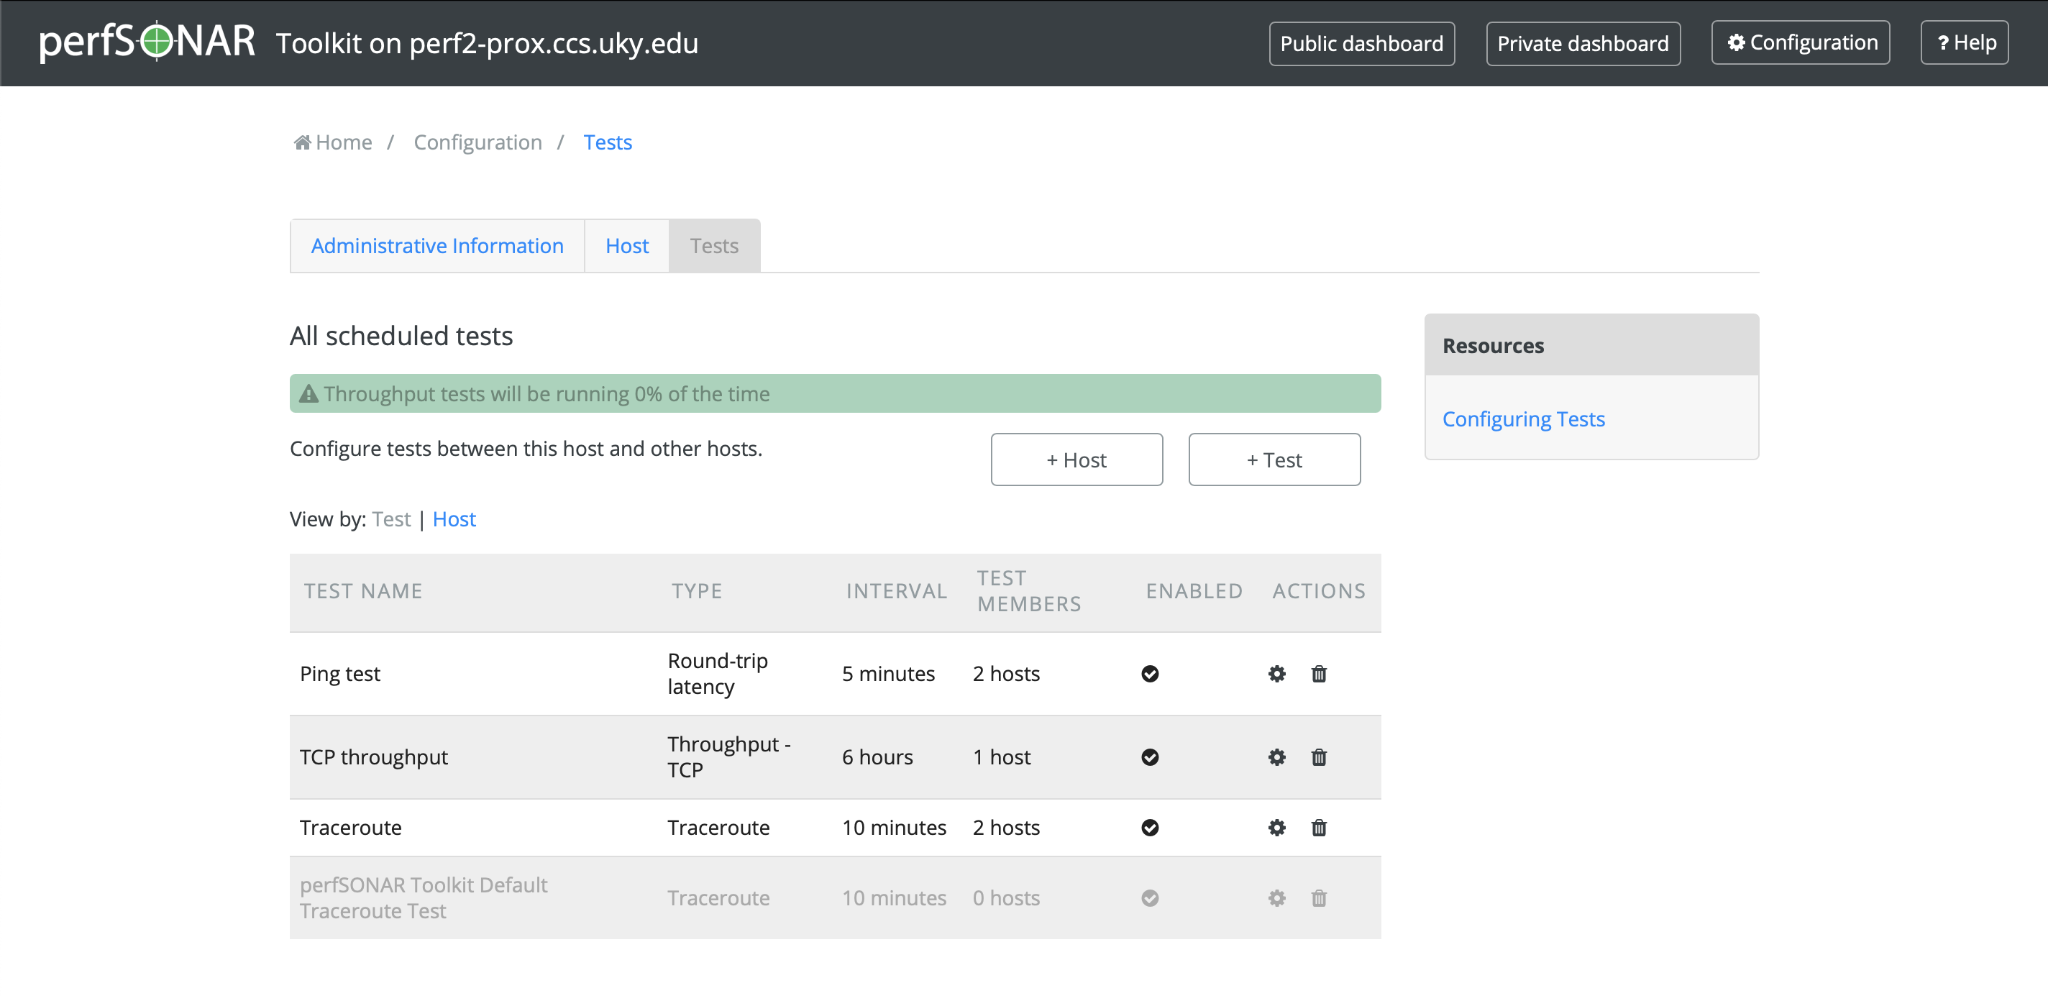
- Click on “+ Test” to add a test.
- Select the type of test.

- Enter the test name/description and add Test Members
- Enter Hostname/IP and Host description (optional) and click add host.

- Click OK.
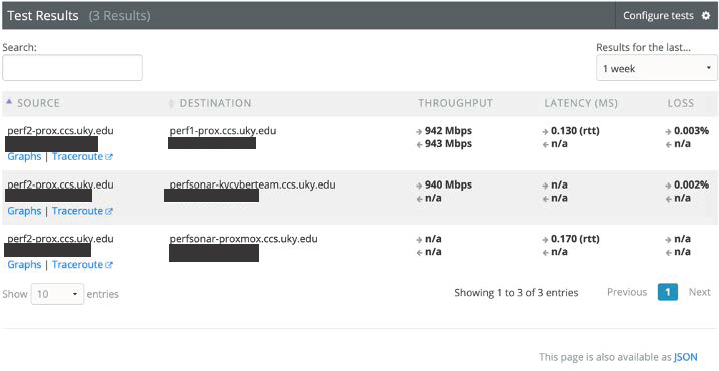
At this point, your PerfSONAR node will start testing with the hosts added and you should be able to see the results in the “Test Results” section of your toolkit homepage.
Configuring Tests with KYCyberteam
To configure tests, you need to download the configuration file given below.
-
Contact a member on the KYCyberteam to let them know you want to join the KYCyberteam tests
a. Current contacts for the team
- Tyler Burkett (tyler.burkett@uky.edu)
- Bhushan Chitre (bch229@g.uky.edu)
b. Make sure to include the IP address and hostname of the perfSONAR node you want to use
-
On the command line after you receive confirmation from the administrator, run the following commands to add the KYCyberteam test configuration file to your perfSONAR node.
a. Substitute the URL in the command with the one provided by the administrator.
sudo psconfig remote add --configure-archives "https://maddash.ccs.uky.edu/psconfig/kycyberteam-config.json" -
Run the following command to restart pScheduler, the service which reads the configuration file and automatically begins running the tests.
sudo systemctl restart psconfig-pscheduler-agent -
After a couple of minutes, you should be able to see test results in the “Test Results” section of your perfSONAR web interface.
For more information, visit the links below:
-
Installing perfSONAR packages on CentOS: Bundle Installation on CentOS — perfSONAR Toolkit 4.4.4 documentation
-
Configure the ToolKit for the first time: https://docs.perfsonar.net/install_config_first_time.html
-
For updating PerfSONAR: Updating perfSONAR — perfSONAR Toolkit 4.4.4 documentation
-
More of the KYCyberteam Documentation: https://kycyberteam.ccs.uky.edu/