Setting up a PerfSONAR Node using Docker
Introduction: This document provides instructions on setting up perfSONAR nodes on an already existing Linux computers using Docker. Use these instructions if you are using a computer with a new OS installation and
Requirements:
- A Linux computer (CentOS 7) with an internet connection and public IP address
- The computer needs to be running a time-keeping system like NTP
- The computer must NOT be running services like httpd or postgres that perfSONAR also uses.
- A super-user account on the computer
Installing Docker
For these instructions, we are using the recommended method of installing Docker and assuming that this is a first-time install of Docker on the computer. If not, you can refer to the official Docker documentation on how to do this installation based on your specific needs.
- Run the following commands to install yum-utils and set up the repository to get Docker.
sudo yum install -y yum-utils
sudo yum-config-manager --add-repo \ https://download.docker.com/linux/centos/docker-ce.repo
- Install the packages for Docker.
sudo yum install docker-ce docker-ce-cli containerd.io
- Start the Docker daemon.
sudo systemctl start docker
- To verify that your installation was successful, run the following command to test that Docker has basic functionality.
sudo docker run hello-world
Running the perfSONAR Container
These instructions follow the assumption that the container will share the same
- Make sure the following ports are open.

- Pull the perfsonar/testpoint container.
docker pull perfsonar/testpoint
- Run the perfSONAR container.
a. This command runs the container in the background and uses the host computer’s networking directly, rather than creating an intermediate setup.
docker run -d --net=host perfsonar/testpoint
- item
a. item
. item
At this point, you can access a shell to the container with the following command and perform commands the same as any other perfSONAR setup.
docker ps # To get the container ID
docker exec -it CONTAINER_ID bash
Configuring Tests with KYCyberteam
To configure tests, you need to download the configuration file given below.
-
Contact a member on the KYCyberteam to let them know you want to join the KYCyberteam tests
a. Current contacts for the team- Tyler Burkett (tyler.burkett@uky.edu)
- Bhushan Chitre (bch229@g.uky.edu)
b. Make sure to include the IP address and hostname of the perfSONAR node you want to use
-
Access the perfSONAR container on the command line.
docker exec -it CONTAINER_ID bash
- On the command line after you receive confirmation from the administrator, run the following commands to add the KYCyberteam test configuration file to your perfSONAR node.
a. Substitute the URL in the command with the one provided by the administrator.
sudo psconfig remote add --configure-archives "https://maddash.ccs.uky.edu/psconfig/kycyberteam-config.json"
- Exit the container shell and restart the container.
exit
docker restart CONTAINER_ID
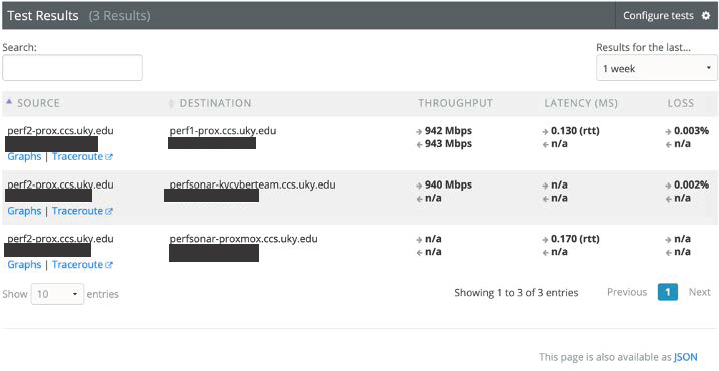
- After a couple of minutes, you should be able to see test results in the “Test Results” section of your perfSONAR web interface at “https://<hostname or IP address>/toolkit”.
For more information, visit the links below:
-
PerfSONAR Docker Installation: Using perfSONAR with Docker — perfSONAR Toolkit 4.4.4 documentation
-
Docker Install: Configuring the MaDDash Server — perfSONAR Toolkit 4.4.4 documentation
-
Docker Commands: Use the Docker command line | Docker Documentation